
What are e-mail templates?
E-mail templates allow you to combine automation and personalization in communication. The following templates map the entire guest journey, from confirming the reservation, to reminders about the upcoming visit, to post-dinner evaluation requests. Of course, this also includes communication with groups, cancellations, etc.
- Confirmation reservation
- Confirmation of provisional reservation
- Cancellation of provisional reservation
- Cancellation
- Reminder
- Evaluation
- Group reservations
- Payment: Request credit card
- Payment: Decline credit card
- Vouchers
How can I customize the e-mail templates?
The e-mail templates can be customized from design to content to suit almost any situation. This allows different automatic e-mails to be sent to the guest depending on the reservation time, shift, number of people, etc., as well as addressing guests personally with title, first and last name.
Two tools make it possible to customize e-mail templates for specific conditions: if-conditions and merge tags.
If-conditions determine when an effect is triggered, e.g. when a note is added to the e-mail template (and when it is not).
Merge tags are placeholders. If you use the CustomerFirstName placeholder in the e-mail template, then the guest's first name is inserted in the automatic mail instead of the placeholder.
Find more information on how to use if conditions and merge-tags in aleno here.
Customize e-mail templates: step-by-step instructions using an example.
Example: For reservations for more than 4 people, the reservation confirmation e-mail should contain the note that changes to the number of people should be communicated via reply to the confirmation e-mails.
To do this, proceed as follows:
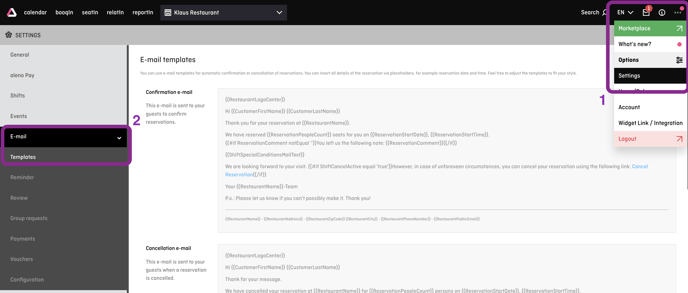
(1) Go to "Settings".
(2) Navigate to "E-mails" and select the menu item "Templates".
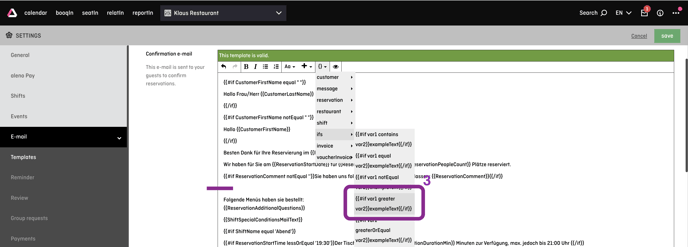
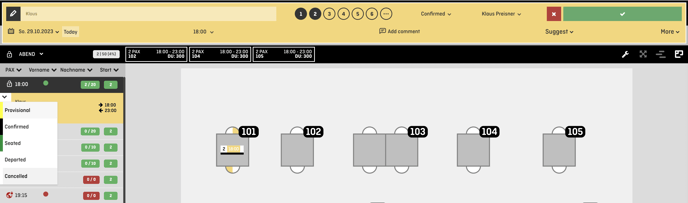
3) In the "Confirmation e-mail" template, go to the place in the text where you want to insert the specific note and select the If condition
![]() from the menu under the curly brackets. The text module is now inserted into the template.
from the menu under the curly brackets. The text module is now inserted into the template.
(4) Now adjust the text module. Instead of var1, the number of people in the reservation should be inserted. To do this, delete var1 and insert the ReservationPeopleCount placeholder from the menu instead.
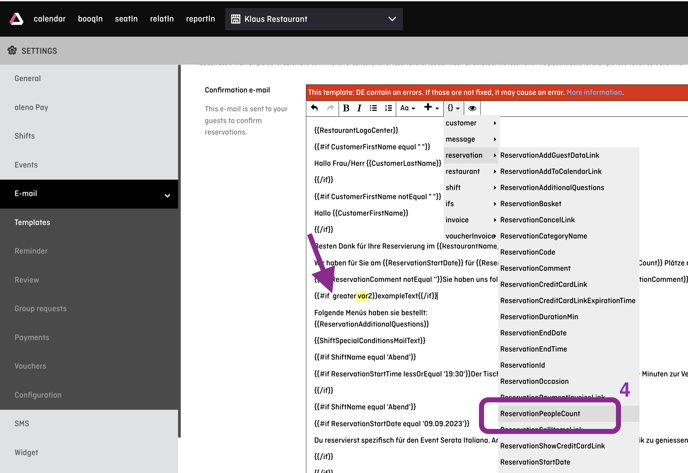
The text module now looks like this: ![]()
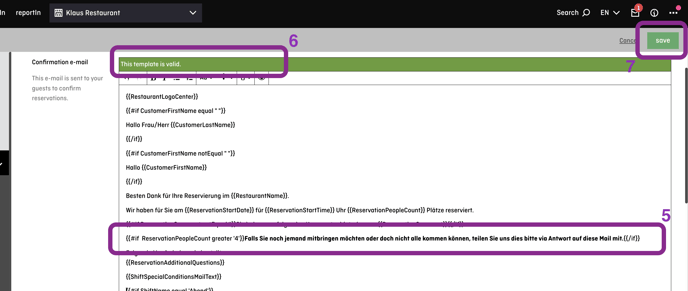
(5) Customize the text module further.

The text module now reads:

This means: If you have a reservation for more than 4 persons, the note If you want to bring someone else or if not all of you can come, please let us know via reply to this mail. should be inserted into the mail.
(6) The green bar indicates that the template contains no technical errors. If there are programming errors, a red bar appears.
(7) Save the changes to the e-mail template by clicking on "Save".
![]()
Insert links and images or attach files
Inserting a link: You can insert a link, e.g. to your menu, into the e-mail template as follows:
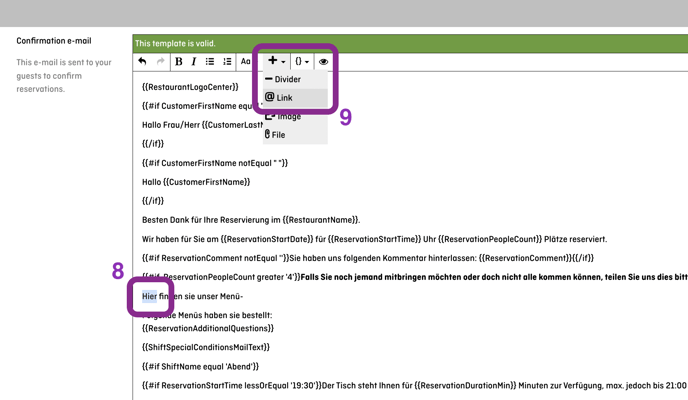
(8) In the e-mail, highlight the word you want to link.
(9) In the menu of the e-mail template, go to the "+" and select the option "Link".
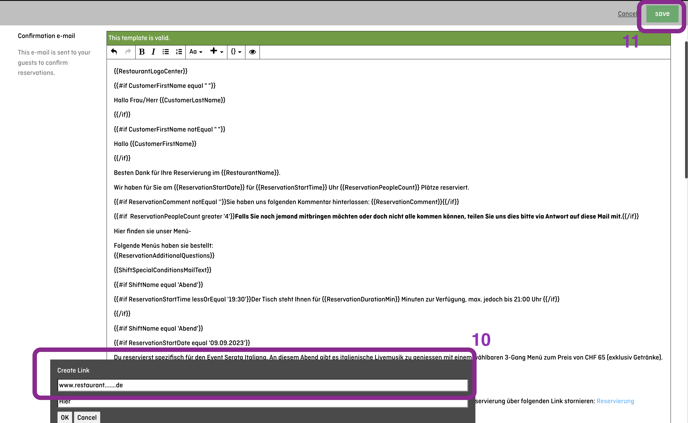
(10) Enter the link address and confirm by clicking "OK".
(11) Save the changes.
Now the guest can click on the word in the confirmation e-mail and thus comes to the linked website or the linked document opens.
Tip: Use the links, for example, to refer to an event, your menu or your terms and conditions.
Insert image: To insert an image go to the place in the text where you want to insert the image. From the "+" menu, select the "Image" option and then the image. Confirm by clicking "OK".
Note: High-resolution images not only slow down the sending process, they also appear oversized to the recipient. We therefore strongly recommend reducing the pixel count of the image to a maximum of 350 x 350 pixels before loading it into the e-mail template.
Attach file: To attach a file. From the "+" menu select the "File" option, then the file you want to attach to the mail. Confirm by clicking "OK".
Language variants / translations
You can enable different languages in aleno and automatically communicate with the guest in these languages.
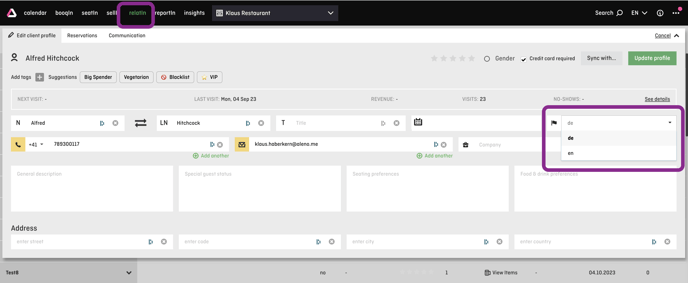
The automatic communication takes place in the language that the guest selects in the widget for the reservation process or that is selected in the backend in the guest profile as the communication language.
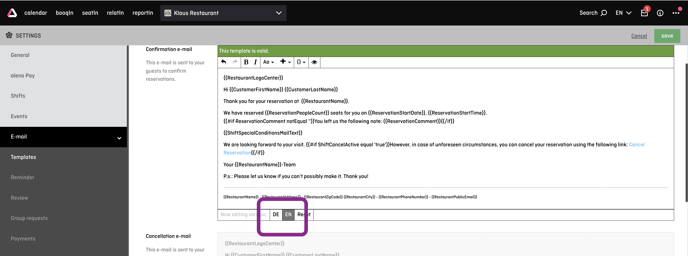
When you customize the e-mail templates, remember to always do so in all the languages you have activated. Once you click into an e-mail template, you can switch between languages at its bottom.
Where can I set which e-mails are sent?
The setting whether and which e-mails are automatically sent to the guest is done on shift level. You can decide separately for each shift and event which e-mails aleno should send to whom.
You can find instructions on how to set up shifts, including how to enable/disable automatic e-mails, here.
Can I decide who should receive an e-mail and who should not
Yes, this is possible: On the one hand, the sending of the mail to a specific guest can be stopped manually in the backend. On the other hand, groups of people can be excluded from receiving the mails.
Backend: Stop sending the rating e-mail to a guest.
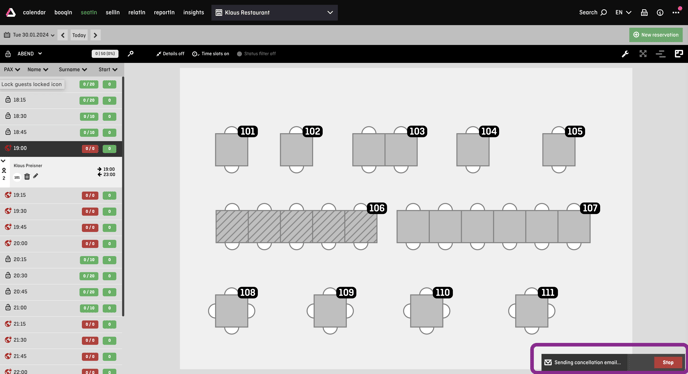
If you change the status of a reservation in the backend, e.g. from "confirmed" to "cancelled", then - if activated - an automatic cancellation e-mail will be sent to the guest.
Now a send bar appears at the bottom left. Click "Stop" within 10 seconds if you do not want the e-mail to be sent to the guest.
In case of review mails, you can also exclude in each shift certain groups of people from receiving the review mails (see below).
What are rating e-mails, what do I have to consider?
If you activate rating e-mails in the shift settings, then the guest will automatically receive an e-mail with a request for an online rating as soon as the reservation status in aleno is changed to "departed" after the meal.
In order to get many and good reviews you should keep two things in mind: First, you should mainly ask satisfied and happy guests for a review. If things didn't go well with the service, the kitchen or the guests, you can manually stop sending the e-mail during checkout (see above).
Secondly, the rating should be very simple, so that the guest can give his rating after just one click.
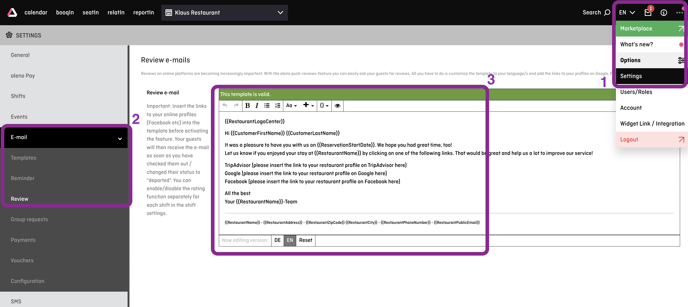
Before you enable the review e-mail feature in the shift settings, be sure to insert the direct links to your restaurant profiles on the three main portals - Google, Facebook and TripAdvisor (see the following figure) and, if necessary, adjust the e-mail template to your style.
(1) Open the settings.
(2) Go to "E-mail" and select the "Reviews" category.
(3) Click into the e-mail template and adjust the text if necessary, e.g. delete the text explanations of the names of the platforms.
(4) Now add the link to the desired rating portals as described in points (8) to (11): You can find them as following:
Facebook: Go to your Facebook page, click on the link ratings and copy the URL.
TripAdvisor: Go to your TripAdvisor page, click Reviews, then in the upper right corner the write a review button will appear. Click on it and copy the URL.
Google: Find out your PlaceID according to the instructions. Paste your PlaceID at the end of the link "https://search.google.com/local/writereview?placeid=".
This is how it looks:
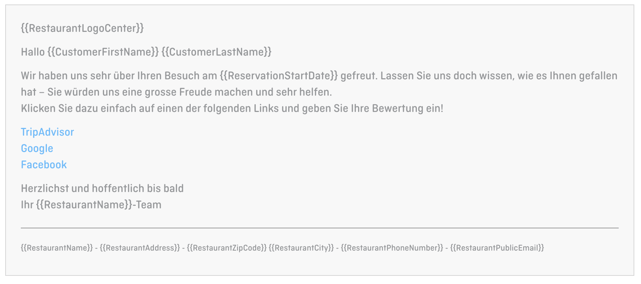
Now click on the eye-symbol in the menu of the e-mail template to leave the editing mode. Now you can test all links.
If you also use other languages, repeat points (1) to (4) for each additional language used. You can switch between the templates in your languages by clicking on the language shortcuts at the bottom of the e-mail template in edit mode.
Now you have to activate the review e-mail in all desired shifts.
(5) To do this, go to the settings.
(6) Navigate to "Shifts".
(7) Select the appropriate shift.
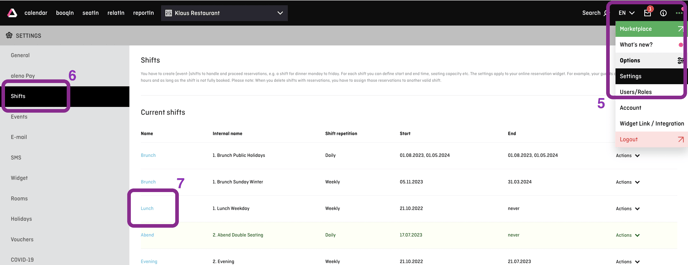
(8) Scroll down to "Review e-mails" and check the box. The rating mail function is now activated.
(9) Now you can specify the guest groups that should not receive the review e-mail. Add with a click on the cross the guest tag of the persons to be excluded, e.g. the guest tag VIP. All guests with this tag will not receive a review e-mail.
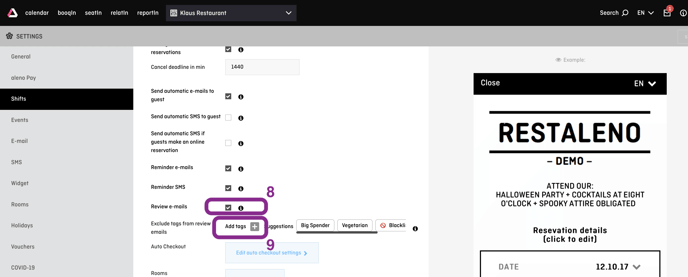
Save the settings.