
Why is it important to create rooms?
Rooms streamline shift planning by allowing the addition of one or more spaces, such as an interior room and a terrace, which can be scheduled based on weather conditions. They enable simultaneous shifts and events in different rooms, with online reservations automatically assigned to the corresponding space. Each room can have a designated table plan, facilitating faster and more efficient service. Additionally, rooms can be rearranged daily to accommodate special events, such as performances or buffets, by adjusting table arrangements as needed.
How can I create a room?
(1) - (3) In the settings (1) go to the category Rooms (2) and click there on "Add new room (3).

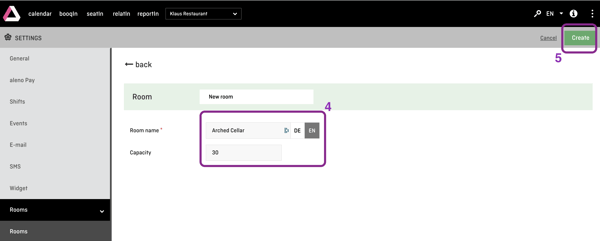
(4) Now enter the name of the room and the number of seats / capacity.
(5) Click on "Create" to save the new room.
To create a new seating plan, you can also duplicate an existing one.
To do this, click on "Action" in the "Options" column of the room overview and select "Duplicate."

This feature allows you to quickly and easily create recurring variations of your base plan.
How can I change a room?
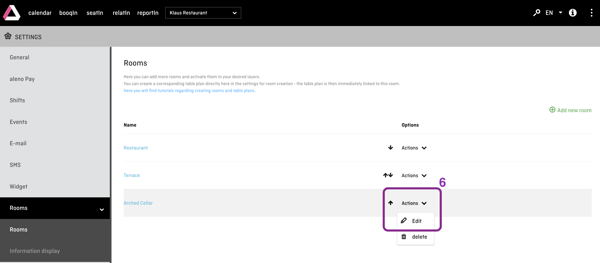
(6) Go to Rooms in the Settings as explained under (1) and (2) above. Navigate to the room you want to change. Open the menu "Actions" and select the option "Edit".
Now you can change the name and the capacity. Also you can create and adjust a table plan.
How can I assign a room to a shift / an event?
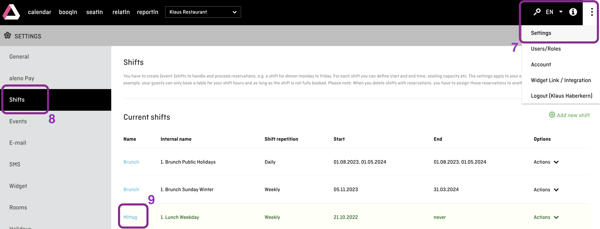
(7) Go to the settings.
(8) Select the category "Shifts".
(9) Click on the shift to which you want to assign one or more rooms. (Alternatively: Open the menu "Actions" for this shift and select the option "Edit").
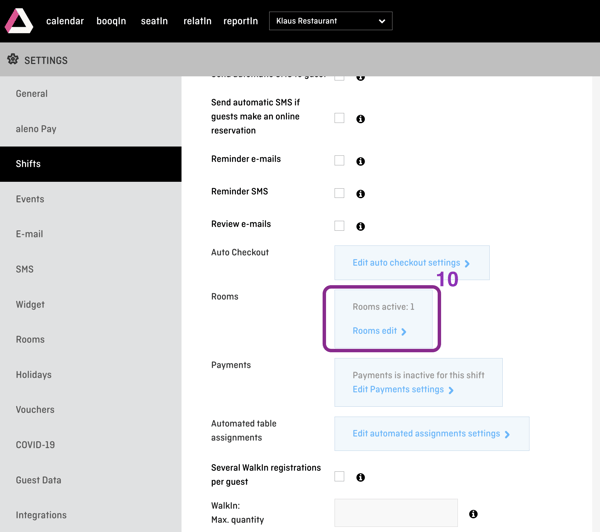
(10) The shift can now be edited. Scroll down to the Setion "Rooms" category and click on "Edit rooms".
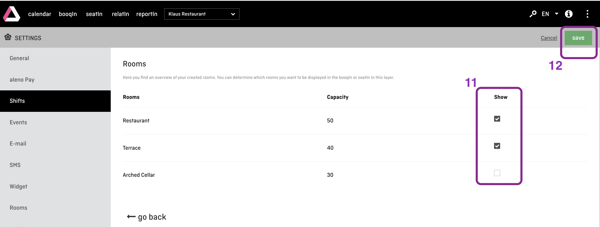
(11) Mark all rooms that you want to use in the shift. You can remove the assignment of a room by clicking on the box again.
(12) Click on "Save" to apply the new room assignment.
How can I change the room assignment for a specific day?
If you want to add or remove a room for one single day, follow these steps.
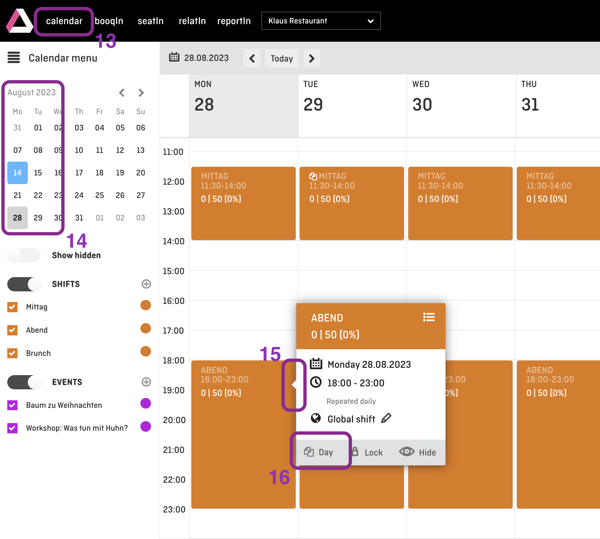
(13) - (14) Go to the aleno calendar and select the respective day.
(15) Select the appropriate shift and go to the settings there.
(16) Click on "Day" to change the global shift into a day shift. The following adjustments will then only apply to this shift and only to this day.
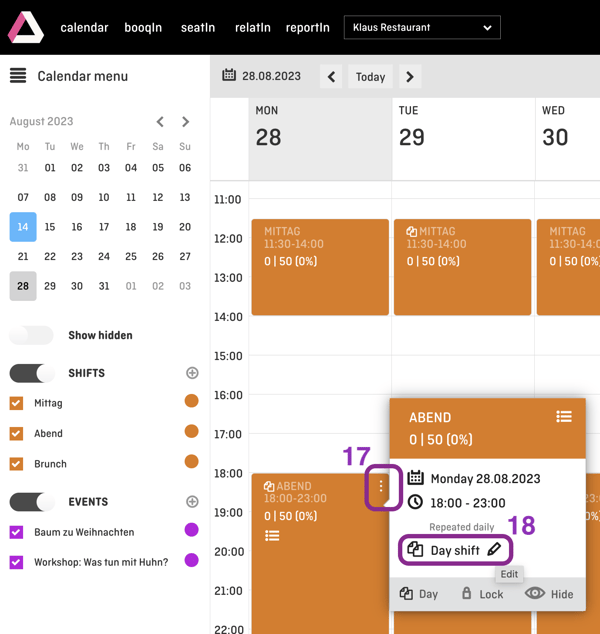
(17) Open the settings of this day shift.
(18) Click on the pencil icon to customize this day shift.
Scroll as in explained under (10) to the category "Rooms" and click on "Edit rooms".
Now follow the points (11) - (13).
How can I draw a new table plan for a room?
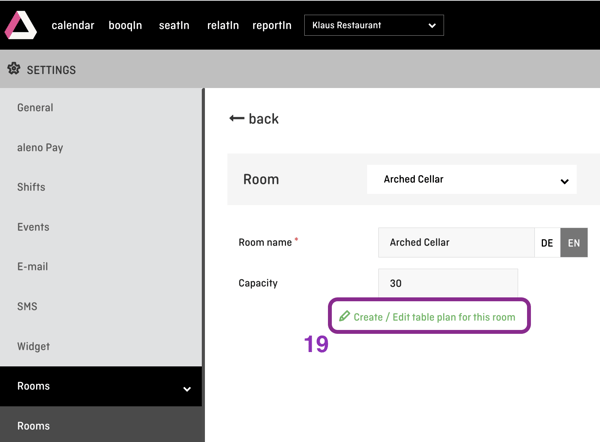
Go to the settings for rooms as described above in point (6) and select the room for which the table plan is to be drawn. Open the menu "Actions" and select the option "Edit".
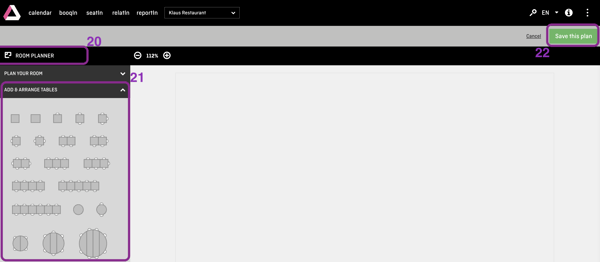
(19) Now click on "Create / edit table plan".
(20) The Room Planner includes two modules: Room Elements AND Tables.
Tables
(21) Tables are available in different sizes (PAX) and shapes, as well as with and without chairs.
- Tables with chairs have a predefined number of seats. The chairs take on the color of the status of the reservation, e.g. Confirmed = Black, At Seat = Green or Canceled (the table is free again) = White. For tables with chairs, the color indicates whether guests are expected, have already been seated, or whether the table is free.
- For tables without chairs, the max. capacity = seats at the table must be entered. The reservation status color is only visible on the table label.
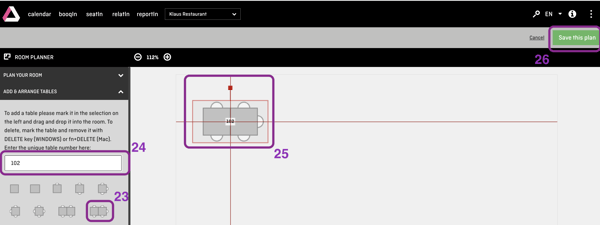
Draw a table on the plan
(23) Click on the table, keep it clicked, and drag it to the desired position in the table plan.
(24) Enter the table number (Names are also possible. However, we strongly recommend numbers for easier control of the optional "Automatic Table Assignment" function).
(25) Lines help to align the table in the room or to other tables. The red box can be used to rotate the table.
(26) Save the modifications.
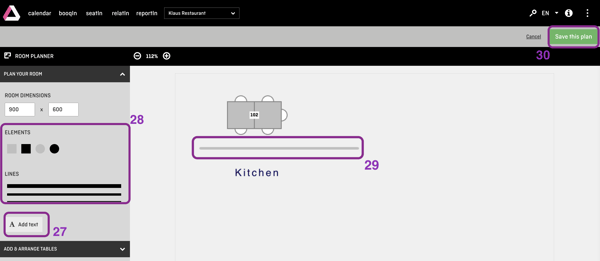
Room elements
(27) Text fields can be used to enter the room name in the table plan, to name adjacent rooms or to designate large room elements, e.g. BAR.
(28) Room elements like lines and blocks also help to structure large table plans with various sections. It is also possible to draw several rooms on one table plan.
Draw in room elements
(28) Click on the room element.
(29) Go to the position in the table plan, click and drag to the desired length (and width, if necessary).
(30) When you have finished creating the table plan, click on "Save".
Edit table plans in shift or for individual days
(31) Go to your seatIn.
(32) Select the appropriate shift and, if necessary, the desired day.
(33) If several rooms/table plans belong to the shift, select the appropriate room.
(34) Now click on the wrench icon and select "Edit Room" to change the room/table plan for all days and shifts.
Click on "Edit room for this day" to adjust the room or table plan for this single day only.

Now follow steps (23) - (25) and (28) - (30) to redesign the room and save changes.
Can I change the display on the tables?
Yes, you can change the display of the names on the tables, e.g. change from "First name Last name" to "Last name, First name".
To do this, proceed as follows:
(31) In the settings, go to Rooms and then to Information display.

(32) Now select the desired display from the pull-down menu.
(33) Now save the change by clicking on "Save".
